
Viper
New Member
- Joined
- Jun 2, 2024
- Messages
- 5
- Vehicle(s)
- Levorg STI Concept
I'd like to use this thread to share and update upon the key things I learn throughout DIY servicing and maintaining my Levorg. I am in Australia so product recommendations are based on what I have access to. This car is a 2015 with the FA20DIT and TR690 CVT.
General equipment:
CVTF:
Getting straight into it here. I bought an 18L drum of Petronas Tutela Multi CVT 700 shipped for $300. On older models drain plug is a 14mm, Which has since been updated to a 17mm head to prevent stripping. Plug is 32195AA021 and gasket is 803916010. Fill plug is 10 mm hex with gasket 803918060 torqued to 50 Nm.
As I was switching from Subaru's High Torque CVTF, I performed 3 drain and fills to replace as much of the old liquid as possible. Draining will remove approx 6-7L of fluid. Fill until fluid comes out, tighten plug, cycle engine gears, drain and rinse and repeat. I used the Alemlube 8828N2 to pump fluid from the drum which was pretty easy. On final fill up, remove the fill plug while the car is running and fill until fluid starts dripping out, then tighten fill plug.
Engine Oil:
A Fumoto drain valve make oil changes trivial. I run the F108-S with a short nipple as my car is quite low. You can attach a pipe to directly to the valve, so no more drain bucket required.
If you choose to retain the original sump plug, the updated plug (17mm head) is 32195AA021 and the gasket is 803916010. New plug is about $35 from dealer.
Front Differential:
Drain plug is uses a T70 Torx which is sold at Bunnings, gasket is 803926090. Check plug is just a 14 mm. To access fill port, pull the rubber hose charge pipe off the top of the differential. The little plastic attachment can then be pulled out and you can fill through that hole. The pump I used for this was the Penrite Little Mate which is worth its weight in gold for this job. Fluid was Penrite Pro Gear 75W-90.
Rear Differential:
Both plugs are 13mm square drive which I bought online for $40 as I figured I would rather not round my plugs using the regular 1/2" drive. I rounded them anyway so I bought two new ones, with part number 32103AA070, $14 each.
The plugs are extremely tight so I recommend using an impact wrench. I had to loosen the mid pipe exhaust bolts to get enough clearance for my impact. I used a Dewalt DCF921 and it took maybe 2 seconds to remove the old bolts.
Liquid gasket is to be applied on a few threads on both bolts. Threebond 1105 is stated but I used Permatex Ultra Grey. Filled with same fluid as front differential.
PCV Valve:
Remove intercooler via 3 bolts and two hose clamps. PCV valve on the top of the engine block with a hose coming out of it vertically. The valves uses a 19mm to remove and I strongly recommend using a deep or long reach socket. My Kincrome 19mm was too short but my Toolpro 19mm barely got a good grip on the valve. Tightening torque is 23 Nm. I used Loctite 243 as it closely matches the stated Threebond 1324.
When trying to access the valve straight on, a metal EGR pipe is blocking it so just remove that and torque to 20 Nm afterwards.
Coolant:
Remove plastic undertray and drain from the radiator. Service manual states use new O-ring but to quote my local dealer "We do not replace or sell O-rings, just put red rubber grease on the existing O-ring". Mine did not have an O-ring anyway.
I used the Kincrome Spill Free Funnel kit for $45 and it makes it extremely easy to burp the coolant, also works on a variety of cars.
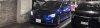
Once I keep performing more tasks I'll post results in this thread. Car in question pictured here (not the black one):
General equipment:
- Bahco aluminium jack and jack stands. Not necessary by any means but fanastic quality and lightweight.
- GKTech Super Low ramps. Provide just enough clearance for my jack, may require higher ramps for larger jacks
CVTF:
Getting straight into it here. I bought an 18L drum of Petronas Tutela Multi CVT 700 shipped for $300. On older models drain plug is a 14mm, Which has since been updated to a 17mm head to prevent stripping. Plug is 32195AA021 and gasket is 803916010. Fill plug is 10 mm hex with gasket 803918060 torqued to 50 Nm.
As I was switching from Subaru's High Torque CVTF, I performed 3 drain and fills to replace as much of the old liquid as possible. Draining will remove approx 6-7L of fluid. Fill until fluid comes out, tighten plug, cycle engine gears, drain and rinse and repeat. I used the Alemlube 8828N2 to pump fluid from the drum which was pretty easy. On final fill up, remove the fill plug while the car is running and fill until fluid starts dripping out, then tighten fill plug.
Engine Oil:
A Fumoto drain valve make oil changes trivial. I run the F108-S with a short nipple as my car is quite low. You can attach a pipe to directly to the valve, so no more drain bucket required.
If you choose to retain the original sump plug, the updated plug (17mm head) is 32195AA021 and the gasket is 803916010. New plug is about $35 from dealer.
Front Differential:
Drain plug is uses a T70 Torx which is sold at Bunnings, gasket is 803926090. Check plug is just a 14 mm. To access fill port, pull the rubber hose charge pipe off the top of the differential. The little plastic attachment can then be pulled out and you can fill through that hole. The pump I used for this was the Penrite Little Mate which is worth its weight in gold for this job. Fluid was Penrite Pro Gear 75W-90.
Rear Differential:
Both plugs are 13mm square drive which I bought online for $40 as I figured I would rather not round my plugs using the regular 1/2" drive. I rounded them anyway so I bought two new ones, with part number 32103AA070, $14 each.
The plugs are extremely tight so I recommend using an impact wrench. I had to loosen the mid pipe exhaust bolts to get enough clearance for my impact. I used a Dewalt DCF921 and it took maybe 2 seconds to remove the old bolts.
Liquid gasket is to be applied on a few threads on both bolts. Threebond 1105 is stated but I used Permatex Ultra Grey. Filled with same fluid as front differential.
PCV Valve:
Remove intercooler via 3 bolts and two hose clamps. PCV valve on the top of the engine block with a hose coming out of it vertically. The valves uses a 19mm to remove and I strongly recommend using a deep or long reach socket. My Kincrome 19mm was too short but my Toolpro 19mm barely got a good grip on the valve. Tightening torque is 23 Nm. I used Loctite 243 as it closely matches the stated Threebond 1324.
When trying to access the valve straight on, a metal EGR pipe is blocking it so just remove that and torque to 20 Nm afterwards.
Coolant:
Remove plastic undertray and drain from the radiator. Service manual states use new O-ring but to quote my local dealer "We do not replace or sell O-rings, just put red rubber grease on the existing O-ring". Mine did not have an O-ring anyway.
I used the Kincrome Spill Free Funnel kit for $45 and it makes it extremely easy to burp the coolant, also works on a variety of cars.
Once I keep performing more tasks I'll post results in this thread. Car in question pictured here (not the black one):